Sunday, 11 September 2011

Fully Recycled Ghost Town House

A short posting this week, other jobs are taking priority at the moment, although I did find some time to try out something I’ve wanted to do for a while and see if I could use small boxes as a basic shape for a house rather than the foam board interior. 

I’ve often put a few different boxes together in different positions to make a skeleton house shape, but once I actually went to do put the building together it wasn’t quite as straight forward to get a unusable shape, and some boxes are too weak. 

This attempt I’ve use a Solero box cut in half and turned inside out along with another box taken apart and turned inside out. The other parts of the skeleton were from packing card from a mail order delivery. By turning the boxes inside and gluing them back together it does improve their strength slightly, plus the non glossy card is easier to work with.
 

I was going to build this as one of the houses in the style of my suburb town, but my supply of coffee sticks has grown recently, the storage boxes have over flown so I’ve decided to use some of these and make this one of the ghost town buildings.  I think is working better as I’m not sure how the thin card would have held up against the wall filler.


Sunday, 4 September 2011

Graveyard Update


Not much to report this weekend, house work and other distractions got in the way, but I did find some time to progress the graveyard pieces slightly.  

Most of the basic paint work has been completed on the stone arches, the walls and gravestones. I started with a dark grey base, as a result of the wall filler being mixed with black paint before it was used on the polystyrene.

For the stone arches I then washed over these with black ink to try and get the dark grime deep down in the stone work before painting over the top with a varying mix of grey and white. For the headstones I simply worked white paint over the top of the original grey colour of the wall filler. The other stone work and general rocks sticking out of the ground were worked with a lighter grey than the built stone structures to give some shade to the otherwise quite grey layout.

To one piece I’ve started to add some flock, this panel of the graveyard borders on the edge of the ‘cursed’ zone, so the main area is going to be flocked with green grass, and the edge where I’ve put a couple more pieces of old twig as dead trees will form the start of the area of devastation.

The twigs have been fixed in place using PVA glue and more wall filler to build up the mound around the root base.  I’ll probably be burning the tops of these as well at some point.

In the foreground the area of devastation will be a contrast to the green resting place near the entrance arches

On the other section I’ve glued some flower arranger’s oasis. I sliced this into a thin layer using a sharp kitchen knife, and then shaved the sides to form as small hill shape. The off cut pieces I glued down around the base of the larger pieces and pressed them down firmly. These then allow me to ‘plant’ trees as in this photo. I’ve a few different trees with wire trunks that can be inserted and removed from the oasis. This will allow the setting to be changed quite dramatically when finished just by the different trees I can insert into the oasis. 

I was just about to cut up another beer case, this time a Budwiser one when I noticed the competition on the side, entering a pack code on line to win. Not expecting anything I nearly just went ahead with the cutting but thought ‘what the hell’ and entered the code online. What do you know; I won a £10 prize. I’ve now got to keep the box whilst I claim. If I hadn’t kept the box for model work it would probably have already been in the recycled bin by now – so my hording has finally paid off.

Sunday, 28 August 2011

The Old Graveyard

To go with the ruined church piece I decided to start making some tile pieces, that when put together will form an old graveyard. These can be used to make up a diorama of an old churchyard or arranged in different configurations to give different graveyards in different locations, some more run down than others. 

I’m basing the various concepts on some of the older graveyards locally, and the graveyards featured in Vampire Diaries Series 1, and various episodes of Supernatural. 


I started by finishing off the church ruin itself, where some of the filler had formed small lumps I decided to paint these up as mould growing on the ruins. These were painted using Games Workshop’s Bleached Bone and Bubonic Brown, and Americana’s Deep Periwinkle.


With two pieces of card and some small cut up pieces of polystyrene from the washing machine packaging I started to layout the first two tiles of the graveyard. The first has a large double arched entrance way now slightly collapsing and some random external wall pieces. The other is more interior, with mainly graves in various states of disrepair and some at an angle implying subsistence.


These I then covered in wall filler, but this time before plastering it on I mixed it with some PVA glue and black acrylic paint giving a very dark grey initial effect to base material before I started. This will make the stonework look very different to the walls of church itself.

To layout the actual grave areas I’ve added some light stony areas. (Talus by Woodland Scenics, Fine Natural.)


Friday, 19 August 2011

Fire in The Old Church

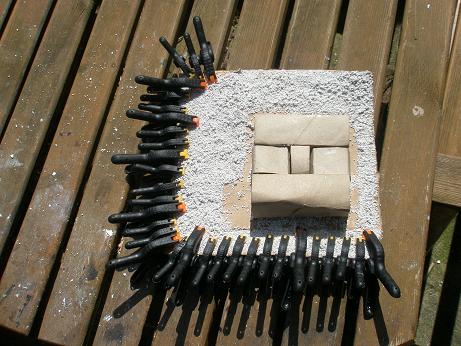
Following my last posting the new washing machine was delivered and installed, as part of the service the old machine is taken away for re-cycling and so usually is the packaging the new machine is delivered in. This time I asked them to leave the polystyrene, at first there were raised eyebrows but once I explained why and showed them one of the cottages they dug a couple of other choice pieces off their van for me, so here is my new horde of material and I’m already eyeing it up with ideas forming. I’ll let the ideas bubble away for a while before jumping in. 

Besides, there is a lot of other work to finish first.


Mainly this week I’ve been working on the old church ruins, the odd plastic pieces passed over to me by BigLee some (embarrassed cough) years ago. Now, inspired by the set from the first series of The Vampire Diaries I’ve started on this small diorama piece adding a piece of the broken wall originally made for the castle ruin set and some pieces of twig and branches cut down from the garden. 


I based the model onto some thick card and using wall filler made some mounds and fixed down the larger twigs as stumpy trees. The whole effect I was going for was for an area of land around the church where nothing now grows, having compiled my own small legend around the piece as I worked on it.

Three different basing materials have been used, grey stone rock debris (Talus by Woodland Scenics, Fine Natural) a red dusty sand (Javis ‘Countryside Scenics’, Sandstone scatter) plus a brown scatter material which I’ve had in the cupboard so long I no longer know the make or colour scheme I’m afraid.

I mentioned in the previous update that I tried to hide the very straight edge plastic look of the model piece, this I did by mixing a small portion of wall filler in with the second basing coat which I repainted the model with, before adding and blending white to make the stone effect. The same paint scheme as used for the castle ruins, allowing me to utilise one of the pieces from that set.

I found the old handle from a wicker basket down the side of the old washing machine, this I’ve pulled apart and used for some of the wild grasses. The natural brown colour adds to the effect of dead plant life. I also stripped fine strands of stringy bark from the old garden canes; these are the very thin straight strands you can see on the model.


Now for the back story...

Asgar turned to his brother. “So what is this place?”
    His brother glance at him. “An old church, destroyed by fire – or so the legend goes.”
    “Legend?”
   Mendez sighed. “They say devil worship took place here, a hundred virgins were sacrificed to open a gateway to the fiery pits of hell. They succeeded but the fire they unleashed burnt the place down. The land is still stained by their blood.”
    Asgar looked down, the land around his feet was certainly very red in patches.
   “Not quite,” called Dynaclease, the third of the brothers climbing over the old tree stump. “Devil worship was being practiced, but the gods sent a fireball from the heavens to cleanse the ground. It struck the church and brought down the tree over the entrance to the crypt, trapping them all in and so they perished in the fire caused by the lightning strike.”
    “I see,” Asgar said stepping backwards. He cried out as a large area of ground gave way under his feet and he fell crashing through into the darkness below.


To give the effect of the possible lightning strike I actually set fire to the tops of the stumps and charred them. There’s nothing like being authentic.

I have a little more detail more to finish on this piece before it’s finished, I hope to get it completed over the weekend.


Sunday, 14 August 2011

Project Update

Apologies for the lack of updates last week, got a bit distracted last weekend with one thing and the other, including a washing machine that decided to smoke the clothes rather than clean them. New one being delivered next week, you never know there might be some interesting packaging to go with it.

 Here are the latest updates from the workbench.

Thatched Cottage Pub

The base for the thatched cottage that got too wet was a bit beyond repair, so I peeled the top layer off and glued this to a new base made in the same way to the original. Now I need to repair some bald patches on the base, before adding extra colour and texture to the ground. I have started to build a small wooden fence around the outside of the pub grounds using the coffee sticks, and incorporated an interesting piece of twig I found to make a felled tree trunk.


Castle Ruins

I’ve started to paint up the entrance to the castle ruins; this is basically using white and black paint mixed in varying shades of grey and neat white. I’ve also added more stone work to the remains of the room. I wasn’t going to brick up the entire underside, but some parts seen at the wrong angle will show up the bare polystyrene so I will have to make sure the underside walls are covered at least.


The plastic pieces of a ruined church I got from BigLee a few years back which I tried to fill and paint then left for dead have been resurrected. I’ve stuck the piece as was onto a new larger piece of base card to extend the ground work and used some of my current ready mix wall filler to soften the plastic edges and fill the gaps to take the straight, square edges off. I’ve also glued a piece of the polystyrene covered broken wall from the castle set to the base.


I’ve been re-watching the first series of Vampire Diaries, and the old ruined church set where the vamps were locked away has given me some idea as to what I want to do with this piece now. Plenty of greenery and sticking up boulders and stones, the graveyard part of it I’ll keep for a later project. I’ve a few plans for an old graveyard layout.

Plus I've added the town houses to Gallery Page.

Monday, 1 August 2011

The Gladiator Games

Gladiator Games
The spectators gathered under a blazing sun on Sunday afternoon to watch the Roman Gladiatorial Games, a re-enactment of what might have happened on the site of the Guildhall Courtyard some many moons ago.


The audience were split into two cheering sides, one supporting the ‘home’ team LONDINIUM (London), whilst the other – where we were, supported for CAMVLODVNVM (Colchester, Essex).

The games started with the two commentators working the crowd, the arena was anointed with oil and the dedications made to the goddess. Then in came the Emperor on his chariot, and the games were ready to commence. The combatants made their entrance then a heckler from the crowd stood up, jeering the display – he was soon dealt with, dragged before the Emperor and thrown into the area where he was duly dispatched.

Hosts for the Games

Those not quite dead are dispatched by the man in black
Several rounds of fights were played out, I’m not going to tell you who won, but just to say that the teams put on a well performed display with plenty of blood spilt to please the baying crowd, either calling for mercy for their fallen team or for a bloody dispatch for the opposition.

Here are a few photos of the event, but please don’t tell everyone. We’re not supposed to let you know that the Emperor ever came...

Disobedient slaves are thrown to the area


No mercy

This is what became of the heckler

There were female contestants as well.


The Emperor departs


The Gladiator Games were presented at the Guildhall Yard, off Gresham Street, London by the Museum of London on the 30th and 31st July. The Gladiators were supplied by Britannia.


Sunday, 31 July 2011

Project Roundup July

Bit of a random blog today I’m afraid, not had a lot of time this weekend for model work, but I thought I’d take the opportunity to round up where some of the projects are at.


Castle Ruins

Not much advanced this month, although the main piece has now had the last of the exterior walls finished, by that I mean covered in wall filler and marked out. There is a small amount of interior work to be completed and some under side work before I start painting. The tunnel entrance way is still undercoated black with no further development. Once the main piece has caught up I’ll paint them all up together.


I’ve been having a rummage in some old boxes, and discovered two things of interest. One piece which comes under this category of ruins is a plastic model piece of aches and windows, which BigLee passed over to me a number of years ago, having decided it wasn’t quite right for the battle table he was putting together and wondered what I could do with it. I think it looked just too plastic, and was really just a front piece, being that it was not even finished on both sides. I tried filling it and painting it, but couldn’t quite get a result either – it went into the ‘deal with this later’ box.  This is how it looks now, I’m going to see what I can do to bring it to life - watch this space.


Scenic Layout

Whilst rummaging I also pulled out a small hillside that I remember making with dad when I was a kid for the model train set. This went into the far corner of the board to make the layout look like it was in a small valley. It was built on a chicken wire frame, covered in sack cloth and papier-mâché, and then painted. It’s suffered a bit over time; I think it’s time it got freshened up and incorporated into my current fantasy layout.


Miltonburg Town

Speaking of the layout, I took some time this month to lay out the larger houses and village pub which I recently built along with some figures and tables which I had built from coffee sticks some time ago for another campaign. This campaign saw me furnish an entire inn interior from bar, stairs, tables, fireplace and bedrooms. Most of the small pieces have survived to be used again. 


Whilst I’m on the subject of my fictional town Miltonburg, a small amount of work has been added to Zandina’s townhouse. 


The baseboard for the pub that got a good soaking thanks to the stormy weather we had a few weeks ago is currently under attempted repair. 


Originally I had cut two sides of the Sol box (see previous posting) and stuck them together twisted at 90 degrees to each other so that the grain of the corrugated cardboard went across each piece, this I had hoped would give the base more stability when gluing on it, to prevent it curling up – but I think the amount of rain has banished any hope of a perfectly flat base.  I’ve re-glued the base and it’s currently being held together. We’ll see.