Sunday 25 August 2013

Lego travels "Back to the Future"

One of my favourite films from the 1980s has to be "Back To The Future". Every time I watch it I’m convinced that with Doc Brown hanging from the cable connected to the clock tower, the time ticking away, the storm on the horizon and Marty stalling the engine there is no way our time travelling hero is going to get home.

Imagine my surprise and delight when I heard that Lego had released a Back to the Future set. Cue music, Da-da-da-daaaa, da-da-da-da-da-Dummmmm.

Off I trod to the local Lego Store and part with my £34.99 to take away a pack that allows you to build the DeLorean time travelling car in any variation from the three films, as after you have built the vehicle there are additional customisation options. The pack also comes with two wonderful Lego Minifigures , Doc Brown and Marty McFly.


On go the CDs
So on went the CDs, and out came the instruction manual and I set to work building the car of my dreams. (There was this time I took part in a stage hypnotist show, *cough* but that’s another story)

Three CDs later I had finally built my Lego DeLorean – I’m sure the original took Doc Brown a lot longer. It also took a lot longer for the original designers of this set to get it from conception to market. This is set number 4 in a range of sets from Lego named ‘CUUSOO’.

The CUUSOO project in short - you can design and submit a Lego model you think other people would love to build to the Lego Cuusoo website.  Then once it appears on the website if it receives 10,000 supporters it goes up before a review committee. The reviews are now undertaken by Lego on a quarterly period and if it passes the review and is chosen for production you get a small royalty, 1% of the sales.

The designers of the Lego Delorean project are two Japanese Lego enthusiasts called Togami & Sakuretsu , they are depicted in the instruction book as two Lego Minifigures. They have also donated their royalty payment to the Michael j. Fox Foundation for Parkinson’s Research. .


These guys form a group called Team Back To The Future and have several other models vying for votes on the website - I'd love to see them released as Lego sets so please give them your support.

The DeLorean in hover mode with doors open, Marty & Doc and some of the customisable features.

Saturday 24 August 2013

Ghost town so far

Again not a very wordy blog post, just like last time. I know usually you can’t shut me up when I start. Although the latest building is not quite ready yet, I couldn’t resist setting out all the buildings for the ghost town including the latest models when I got the opportunity the other day.


Friday 23 August 2013

Scrap build model update paint work

There’s not too much to say that hasn’t been said already regarding the paint work for these models, so rather than whiter on here are some pictures.  Previously I showed the black undercoat stage.

Black/Dark Brown 50/50 mix


Dark Brown


Dark Brown/White 50/50 mix


Dry Brush White


The only things left to do are the windows and the varnish.

Sunday 18 August 2013

Scrap build model update.


It’s a good feeling when something comes together and turns out better than you expected. This was really just an experiment with using up odd pieces of foam board which because of their size and shape controlled what I could do to some extent. I think the discovery of the extra triangular piece I found just before doing the roof made the model for me. I also especially like now it’s finished the slightly irregular shape of the roof – I think it adds character to piece and keeps it in line with the very rustic nature I’ve been going for.


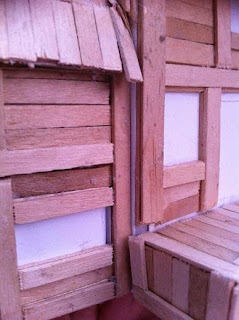
The doors have been added, by sticking on strips of coffee sticks that have been cut vertically to make thinner boards.

For one I've put a small window in the door and another round the back I stuck extra thin planks across the middle to give the appearance that the door could be half opened. 

The gaps have been filled or had pieces stuck over them, the model sanded down to get rid of any glue that might have seeped through.


Anyway the painting has now started and the under coat is on. 

I’ll be following the same basic painting strategy of undercoat black, then black/dark brown 50% mix, dark brown, dark brown/white 50%, dry brush white. In each case the layer that goes on is painted quicker, more sweeping strokes and so not going back over the same area to ensure that there is colour bleed through from the earlier layers. The paint layer is applied thinner but the paint is not watered down.


Wednesday 7 August 2013

Model Updates

Thought I’d post a few recent photos showing the latest work on these two models, the scrap piece house and the mystery model.


The scrap built house has now been put together and the areas around the joins are being patched up, covered over and generally made to look complete.


For the tall mystery model I’ve started to build a frame work top so that it can be used as a lookout tower. 

I also like the suggestion of a siege tower so will make a small trolley base to sit it on a later date to be able to adapt it. Thanks to Paul at Paul’s Bods for that excellent suggestion.