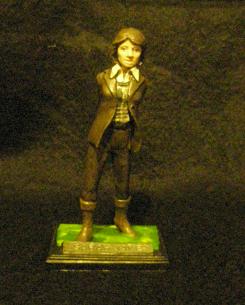
Friday, 22 April 2011

Project Round Up - Good Friday.


Had one of those odds and ends days where I gathered up a number of the projects I’ve been working on over the last few weeks in a bid to try and get some of them finished off.

Castle Ruins – Castle Entrance. I’ve now got the front entrance brickwork and the right hand side brick work finished. I did this today out in the garden with the sun quite strong for this time of year. I found that the wall filler was drying off faster than I could get the side covered. I had to work in smaller sections  to be able to carve the stone effect into it before it dried too much. If it dries too quickly the stone effect becomes a bit crumbly when it is dug into. The best thing in hot weather is to work on smaller sections at a time, but because it does dry quicker you can get more area coverage in the long run.

Castle Ruins – Walls. I got the paint job done earlier in the week, so today these pieces were given a spray with ‘Purity seal’ from ‘Games Workshop’.

Coffee Stick Houses . There are currently two being worked on. One had a few missing pieces added on to it, the smaller one has reached the stage for undercoating. As I was working outside I took the quick fire approach and sprayed with ‘Chaos Black’ also from ‘Games Workshop’.

Log Cabin. This is a test piece using home grown canes.  I’ve added some cane pieces now to two sides, once the glue dries I’ll clean up and see what it looks like. I did find that a couple of the cane pieces had fallen off from the first attempt, but I’m not giving up yet. I think this will work.

Wednesday, 20 April 2011

Elizabeth Sladen Tribute

In memory of Elizabeth Sladen


Doctor Who fans world wide are again in shock and grief as another legend from the series has passed away. Elizabeth Sladen first appeared as Sarah-Jane Smith the plucky journalist that stowed away on the TARDIS in 1973 opposite Jon Pertwee.

Sarah-Jane then stayed with The Doctor when he became Tom Baker and remained until 1976.  Elizabeth later reprised her role in the spin off K9 & Company, The Five Doctors and when the series returned she was once again invited back to bring Sarah-Jane to a new generation, being rewarded with her own award winning spin off series The Sarah-Jane Adventures.

I met Elizabeth at several signings and conventions and always found her to be warm and friendly, just like the character she portrayed in Doctor Who.

I’m not sure if it wasn’t for the partnership of Tom Baker and Elizabeth Sladen I might not have got so hooked on Doctor Who.


Our thoughts go out to her family and close friends at this sad time.

Sunday, 17 April 2011

Home Grown Log Cabins

Stick with me on this one – the model work had to take a back seat this weekend as the garden really had to have some attention paid to it. From these before and after shots you’ll see why.


However, notice the dead wood in the before picture – I have some Golden Rod and Michealmass Dasiy growing in the garden, when they die back they leave long, thin, straight canes.

I’ve cleared up last year’s dead wood and whilst doing so had an idea. Log cabin models.

I’ve left the best of the sticks to dry out properly but I’ve made a mock up to see if they might work. Looking at the model below I think it might actually work. Not sure about painting them up yet but I'll use this test model to see what happens.

So now I’m not only recycling old rubbish to make terrain I’ve started to grown my own as well.

I’ll report back with results later.


Saturday, 16 April 2011

A tribute to two very special people.


Doreen Kettlety 6th June 1928 – 16th April 2008
Joseph Kettlety 3rd October 1924 – 26th November 2009


I have been painting figures and building models now for many years, and I’ve certainly inherited this creativity from my parents, I think it must be in the blood.

Today is a sad day, it is the third anniversary of the day mum lost her battle with cancer, and having been married for sixty years that took its toll on dad, and he passed away eighteen months later from a heart attack. So today I would like to pay tribute to both of them, and share some of their creations which live on, along with loving memories.


When I was a kid, the school had its annual fate, and mum along with my then neighbour would always be found running the handicraft stall, having more or less completely populated that stall themselves with knitted gloves, scarves and hats, cuddly toys, tea cosies, dolls clothes, puppets – you name it they made it.

You may have guessed by now that I’m a fan of a certain TV programme, Doctor Who. Mum knitted both the multicoloured scarf and the burgundy variation made famous by the 4th Doctor, Tom Baker. In fact – and I’ll post when I find the picture – mum made the entire original costume for me and it has served me well for many fancy dress parties.


When it came time to update the costume mum’s knitting skills were put to the test by knitting the 7th Doctor’s question mark pullover worn by Sylvester McCoy.

We examined photos of the costume closely to get the pattern right stitch by painful stitch.  I’m sure you’ll agree from these photos mum did a very good job of the whole costume.


I said the craft comes in the blood, and dad’s gift was working with wood, which my brother has inherited. He always said wood work was his best subject at school.

Here you’ll see samples of the display cases dad built for me, from wall mounted cases for the lead figures seen here with some of my Doctor Who figures, to large free standing model cabinets, with plate glass shelves for my many fantasy collections.

Dad also turned his hand to display cabinet draws, when I needed something that extra bit special for a special collection.


When I was very young, dad built a mini store for me, and then for a later Christmas my first Hornby Train Set, complete with a village layout – now guess where my love of building scenic layouts and models came from.

Although today does have sad memories, whenever I think of my folks I’m left very warm memories, and I thought today would be appropriate to share some of them.

Thank you.

Monday, 11 April 2011

Castle Ruins - Ongoing work

Another weekend with only a few hours spent working on the models.

First I’d like to say a big thank you to all those who have promoted my blog on their sites, your support and encouragement is much appreciated as well as any comments left. Speaking of comments...

Luckyjoe asked about murder holes for the entrance way to the castle ruins. I admit I forgot all about those small holes in walls and ceilings where defenders could pelt invaders with rocks or pour down boiling oil. These were a very vital part of a castle’s defensive measures. To really do justice to them is a bit late now, as I’ve already lined the entire entrance with the filler, but there was an area along the top where a square shape on the original polystyrene did cry out for something a bit extra to make a feature out of it.


Using a metal rod I managed to break through the wall filler and make four suitable holes in each corner of the square. These will be turned into some murder holes, but I will be making an additional piece for the entrance later so I’ll make certain I give more thought to the forward design.

Cheers Luckyjoe now who ever GMs using these has an extra weapon to use against the players, guess I should start writing my own adventure. (BigLee beware, you think our current GM is EVIL – sign off with manic laughter...)

I also realised that there were no window pieces either, so in the other curved section I was working on I cut out some small window shapes this time before I added the wall filler.

Up until now I’ve been using plastic coffee sticks to cut the stone shapes into the wet wall filler, but they don’t actually last very long and soon snap.

So I’ve given in and bought a new small chisel blade to use for the stone work – a quick trip to the local hobby shop this weekend.


This wall and the flag stone tile effect I’ve put on to the top of the entrance way were carved out using the new blade, I don’t think you can tell the difference.

I’ve only got as far as undercoating with black acrylic paint this weekend – I’m going to try and get the grey colouring done during the week if I get a chance.


Sunday, 3 April 2011

Castle Ruins - Tunnel Entrance and Layout

Time has been against me again this week when it came to model work, but with a sunny Sunday afternoon here I managed to get a couple of hours in the garden to work on the castle ruin entrance tunnel.

You might recall when I first got hold of the large pieces of polystyrene I said to look at them from every direction before cutting them up.  During my examination I noticed a section that would make a great tunnel or passage way.


Using the  hot wire cutter I removed this section. This gives me two sides, with pillars, and a roof. You might notice that the original packing had taken some damage – this happened when I was trying to get the polystyrene home last November during a blizzard, gripping hard onto the large pieces trying to escape in the driving snow my grip broke some chunks off. Anyway it will all add to the final effect.


I’ve now managed to cover the inside of the tunnel (sides and roof) with filler and I’ve carved the stone work in. Over the next couple of weeks I hope to get the outside finished and then painted.

Working outside today I got the first chance in a while to lay out all the finished pieces made for the castle ruin set so far. Here are a few pictures of just one configuration of the pieces.


Sunday, 27 March 2011

Dungeon Extras

Not had much time this week to work on the many projects I have on the go at the moment, just had time to add a few extra accessory pieces for the dungeon set.

Having left the inside archways clear of wall filler, so that initially I could add back in the original cut out arch shapes also disguised with wall filler to block them up as either solid walls or secret doors, I took advantage of the easy to cut exposed polystyrene.

I cut a channel up both sides of the arch way using a sharp craft knife, making the channel thick enough to slide a piece of card into the slot.


Having cut the card to size I then covered the card with strips of thin wood – back to using the coffee stirring sticks. Once the first layer was dry, I attached a few additional pieces along the top, and sides, and down the middle to give the effect of double doors. These were given a black under coat with acrylic paint and then painted up with a brown colour layer and a quick white dry brushing to add aging.

I repeated the channel cuts in one of the other archways and again cut a piece of card to fit. This time I stuck two thin strips of card down the middle of the base card then covered the card with a piece of foil paper.


I stuck this down, allowing the strips of card to bulge through to look like iron work. Along the top and bottom I glued additional pieces of silver foil, this time with a pitted effect already in the material to look like huge hinges.

Once this was dry, I painted the whole thing with black paint then dabbed it off using a piece of kitchen towel – this gave the whole mottled effect. 

* Can you guess where the two pieces of foil came from?


Finally I made a rock fall piece to fit into one of the archways. This was made from one old wine cork – the old cork kind not the new modern plastic corks.

I broke the cork into pieces and glued it together in a heap shape using a piece of card as the base.  Make sure that any flat sides are on the inside and that the rough broken parts are facing outward.

As you can see this still need to be finished off with a touch of paint to blend it in.


Full set of pieces for the dungeon archways

* The iron door covering came from the top seal of a Pringle’s tube – silver side out
The pitied foil was from the edge of a dissolvable aspirin strip.